
Welcome to your go-to guide for bathroom renovation ideas in New Zealand, where style meets practicality to transform one of the most-used spaces in your home. A bathroom upgrade isn’t just about looks, it’s about creating a space that works for your lifestyle, adds value to your property, and makes everyday routines more enjoyable. Whether you’re aiming for a simple refresh in a small apartment or planning a full-scale remodel in a family home, this guide will walk you through the latest trends, smart design solutions, budget-friendly tips, and expert insights tailored to Kiwi homeowners. From modern minimalist styles to eco-friendly upgrades that help save water and energy, you’ll find inspiration and practical advice to design a bathroom that feels both functional and inviting.
Bathroom renovation ideas in NZ include updating to walk-in showers, adding floating vanities for small spaces, using light colour schemes to make rooms feel bigger, installing heated flooring for cold winters, and choosing eco-friendly fixtures like low-flow taps and LED lighting. These upgrades improve functionality, add value to your home, and create a modern, comfortable space tailored to New Zealand homes.
Table of Contents
Why Renovating Your Bathroom Matters
Your bathroom shapes daily comfort and long-term home value. A smart refresh can make mornings smoother, reduce bills, and lift buyer appeal. What do you want this space to do for you?
Increase In Property Value
- Buyers in New Zealand scan photos for clean, modern wet areas. A fresh bathroom can push your listing higher on shortlists.
- Focus on the upgrades buyers notice first: new vanity, frameless glass, quality tapware, fresh tiles, and good lighting.
- Small wins count. A heated towel rail, mirror cabinet, and tidy grout signal care and reduce buyer objections.
- Returns vary by area, quality, and scope. Aim for durable finishes and a cohesive look across fixtures and tiles.
Better Functionality For Everyday Life
- Families need storage and easy cleaning. Choose floating vanities, deep drawers, and recessed niches that keep clutter off benchtops.
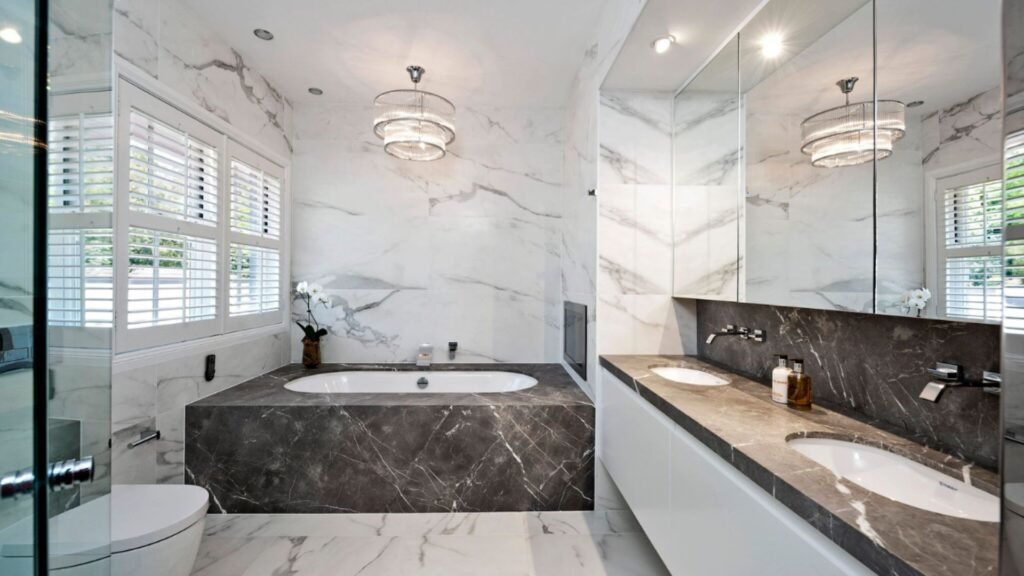
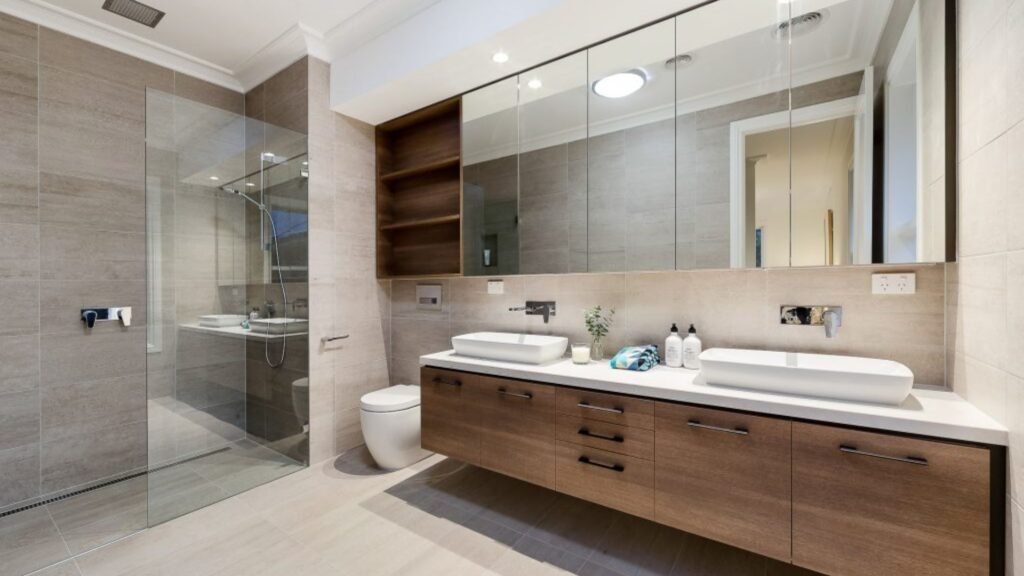
- Couples move faster with a double vanity, wide drawers, and separate storage zones. No more morning queues.
- Older homes benefit from layout tweaks: walk-in showers, level entry, and non-slip tiles improve safety and ease.
- Ventilation matters in NZ’s damp climate. Add an extraction fan sized for the room and duct it outside to keep mould away.
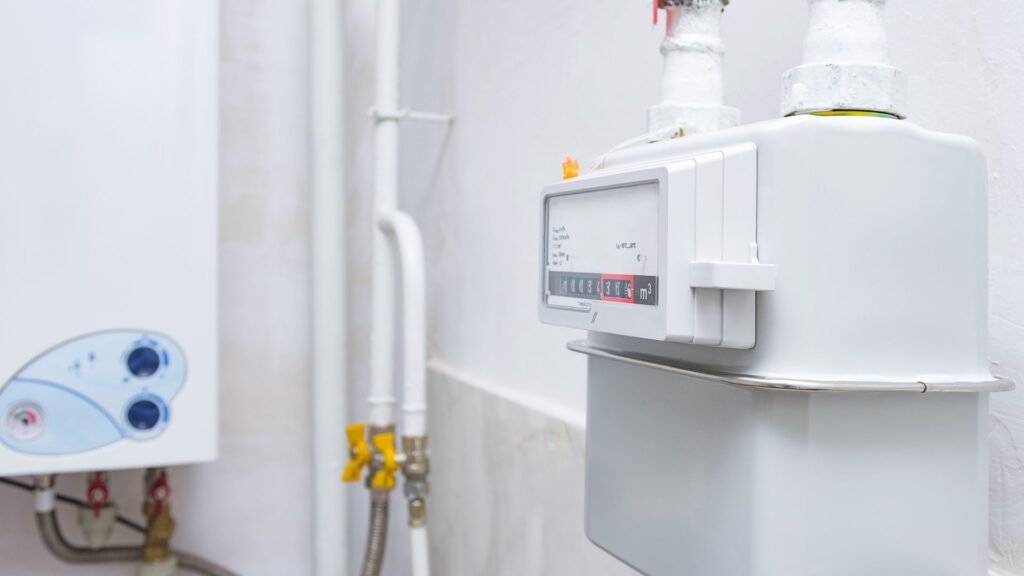
Energy And Water Savings
- Pick low-flow showerheads and dual-flush toilets with solid WELS ratings. You cut water use without losing comfort.
- Swap to LEDs and add a dimmer for night use. You get bright task light when needed and soft light when winding down.
- Use timers or smart controls for heated floors and towel rails. Enjoy warmth in winter mornings without wasting power.
- Insulate hot-water pipes near the bathroom. Shorter heat-up times mean less water down the drain.
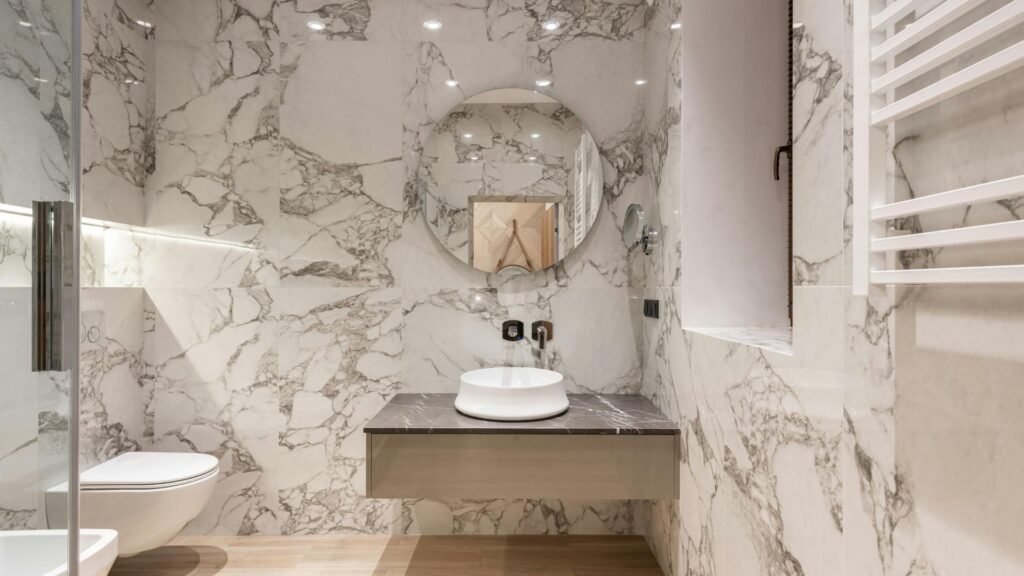
A Fresh, Modern Look You Enjoy
- Light, neutral tiles make small rooms feel open. Add texture with terrazzo or vertical subway tiles for interest.
- Natural touches suit Kiwi homes. Think timber-look vanities, stone features, and greenery that thrives in humidity.
- Black or brushed-nickel fixtures give a crisp finish. Keep the metal tones consistent for a calm, considered look.
- Style the room with quality towels, a framed mirror, and a simple scent. You create a space you want to start and end the day in.
How This Guides Your Next Steps
- Define your goal first: value lift, easier mornings, or lower bills.
- Set a budget band and choose upgrades that serve that goal.
- Build a shortlist of “musts” and “nice-to-haves” to keep decisions simple.
- Save inspiration from local homes and showrooms so choices fit New Zealand conditions.
When you plan with purpose, the right bathroom renovation ideas NZ deliver comfort now and stronger resale later.
Popular Bathroom Renovation Trends In New Zealand
New Zealand bathrooms balance style with daily practicality. Homes often have compact footprints, damp-prone rooms, and busy family routines. The ideas below fit local needs, work with our climate, and give you a modern, low-maintenance space.
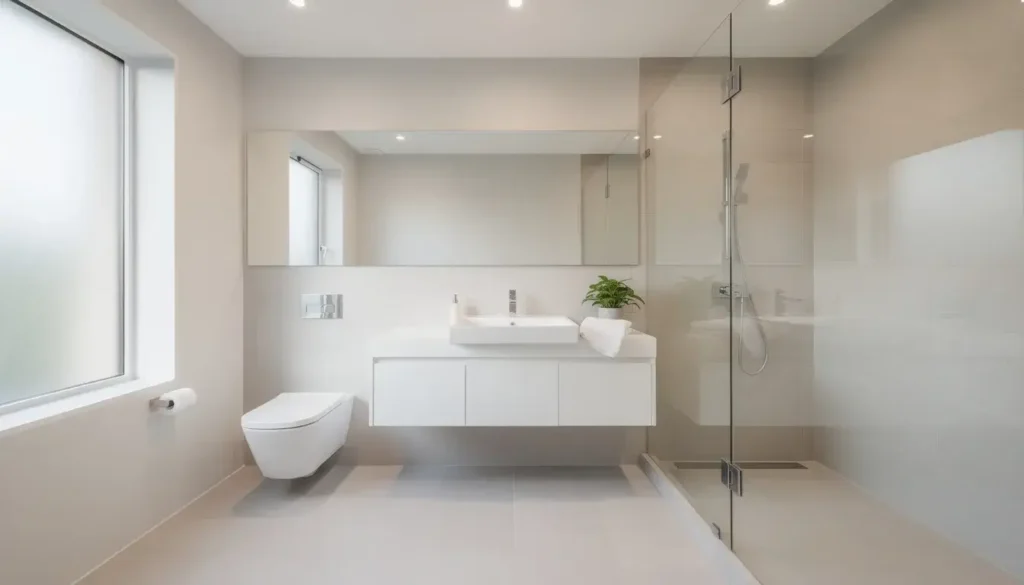
Minimalist, Clean Lines
Strip back visual clutter so your bathroom feels calm and easy to clean.
- Choose wall-hung vanities and toilets to open floor space.
- Go for handleless cabinetry, simple tapware, and flush shower drains.
- Keep the palette tight: two to three tones across walls, floors, and fixtures.
- Use large-format tiles to reduce grout lines.
- Pro tip: Warm it up with texture, ribbed timber fronts, linen-look tiles, or woven baskets, so the space never feels clinical.
- Ask yourself: What can you remove rather than add?
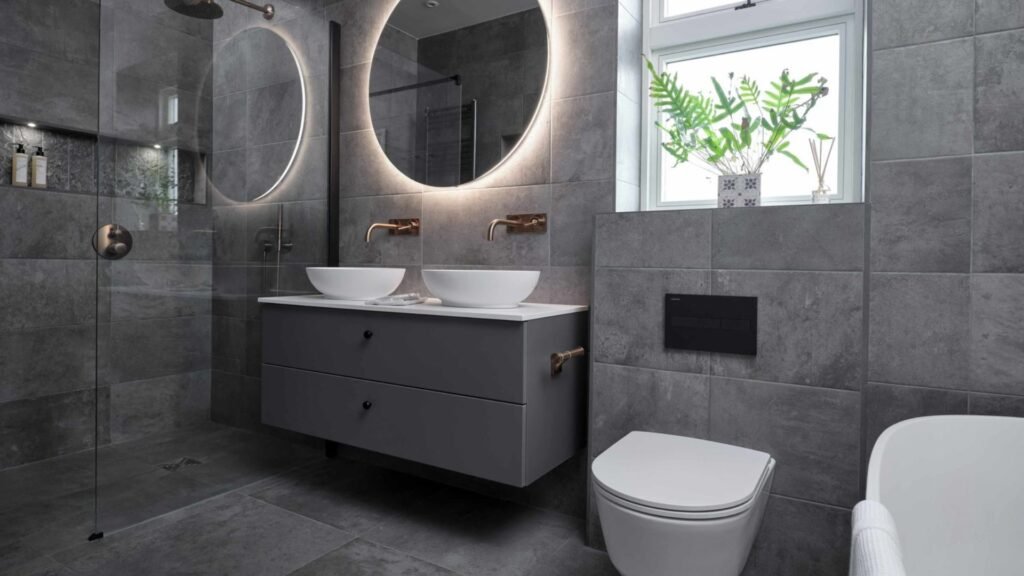
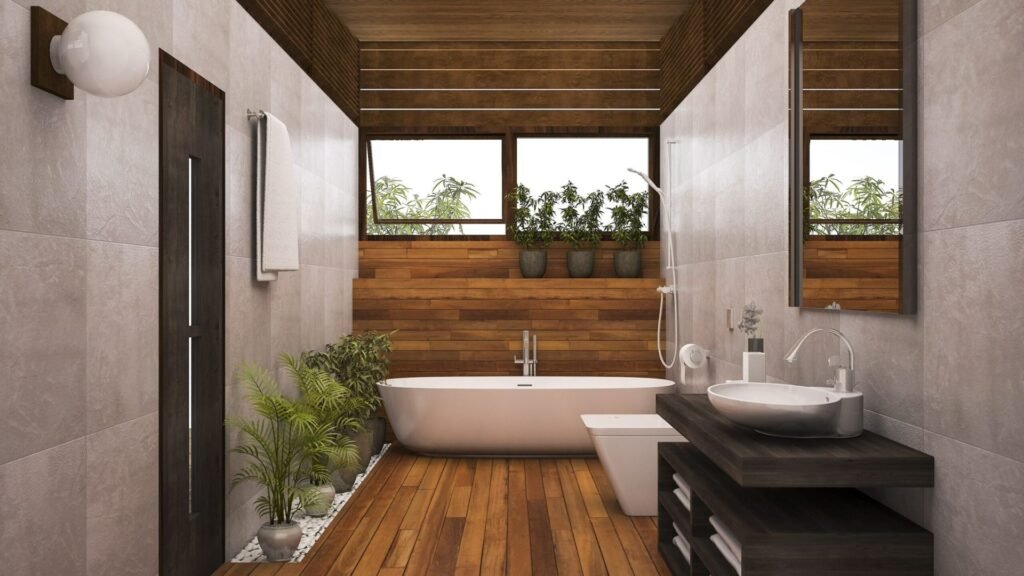
Natural Tones And Materials (Wood, Stone)
Nature-inspired finishes suit coastal and bush settings across NZ.
- Pair light stone-look tiles with oak, ash, or bamboo cabinetry.
- Choose moisture-ready timbers (teak, cedar) or wood-look porcelain for durability.
- Seal natural stone and ventilate well to fight mould.
- Mix matte whites, warm greys, and soft greens for a relaxed, timeless scheme.
- Tip: Repeat one natural element (like a timber vanity) in small accents, stool, mirror frame, to pull the look together.
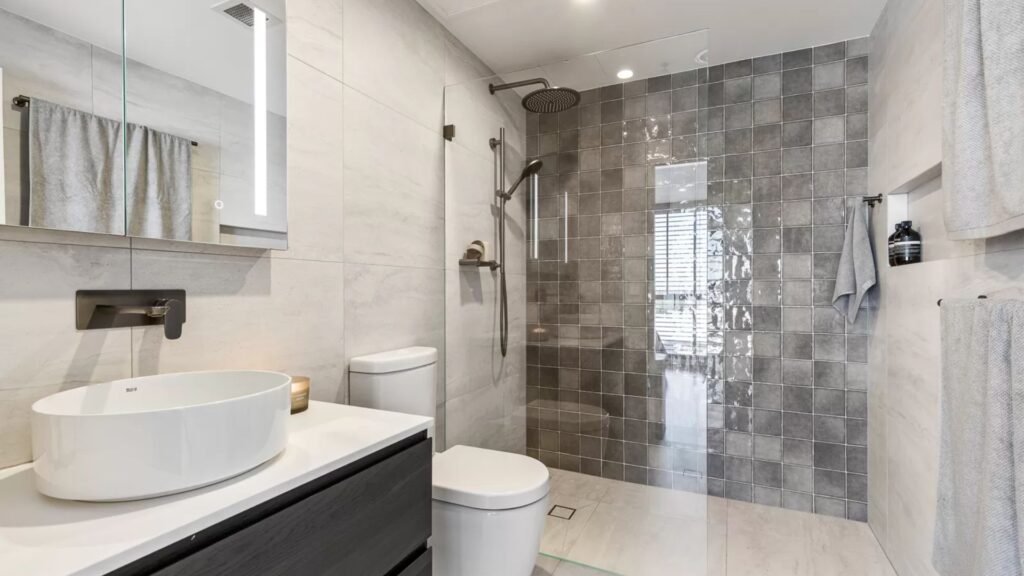
Walk-In Showers And Frameless Glass
Walk-in showers maximise space and make cleaning simple.
- Use a tiled, level-entry base with the right fall to the drain.
- Install frameless or minimal-frame glass for an open feel in small rooms.
- Pick slip-resistant tiles (R10+ ratings) for safety.
- Add a built-in bench or hand-held shower for aging-in-place.
- Detail to get right: Proper waterproofing behind walls and floors. It’s worth hiring a licensed pro for this step.
Smart Storage For Smaller NZ Homes
Smart storage keeps benchtops clear and mornings stress-free.
- Recessed niches in showers and above baths for bottles and soaps.
- Mirrored cabinets to hide clutter while bouncing light.
- Toe-kick drawers under vanities; shallow shelves over doors.
- Custom inserts for hair tools, cleaning supplies, and first-aid.
- Planning tip: Map door swings and appliance cords so drawers never clash with the shower screen or heated towel rail.
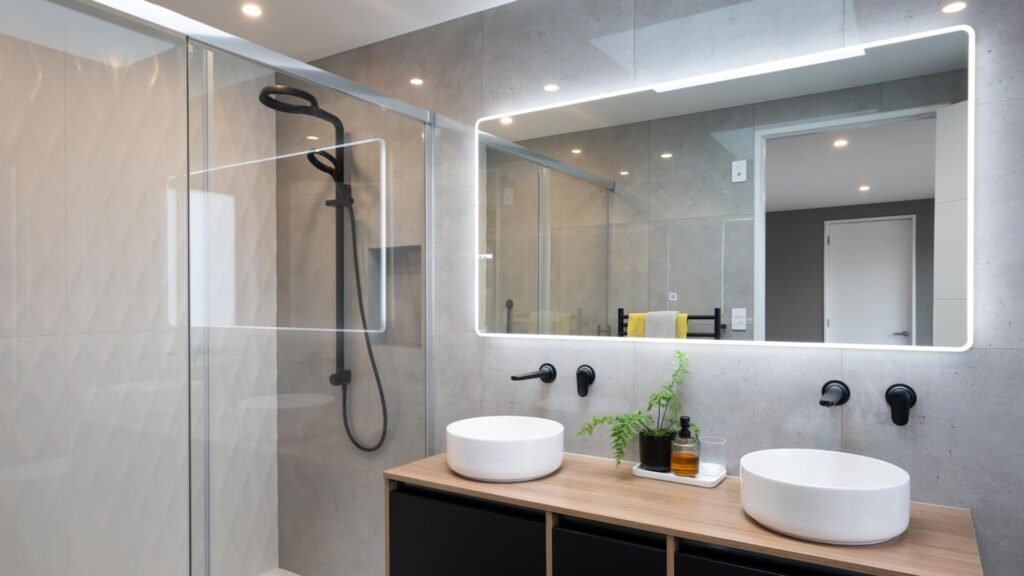
Black Accents And Matte Finishes
Black details give crisp contrast without overpowering the room.
- Try black tapware, shower frames, towel rails, or cabinet pulls.
- Choose hard-wearing finishes like PVD-coated tapware to reduce fingerprints and wear.
- Balance with light tiles and warm timber so the space stays bright.
- Mix textures, matte tapware, satin tiles, soft towels, for depth.
- Care tip: Wipe after showers to prevent water spots, especially in hard-water areas.
How To Pull It All Together
- Start with function: who uses the bathroom, and when?
- Lock in layout and storage first, then select surfaces and fixtures.
- Build a sample board with tile, vanity finish, grout, and tapware to check tones in your daylight.
- Invest in waterproofing, ventilation, and heating; save on accessories you can swap later.
- Keep the copy on your project plan simple: one page with dimensions, products, and lead times.
Practical Bathroom Renovation Ideas NZ
Small Bathroom Ideas
Floating Vanities To Save Floor Space
Wall-hung vanities make the floor visible, which makes a tight room feel larger. Choose 450–500 mm depth and drawers over doors for better storage. Plan solid wall bracing for the mounting points and keep plumbing inside the wall to maintain a clean line.
Large Mirrors To Create Depth
A wide, frameless mirror spreads light and doubles the sense of space. Aim for 900–1,200 mm width above the vanity. Consider a mirrored cabinet (about 120–150 mm deep) to add hidden storage. Add a demister pad and backlit LED for clear, even light.
Light Colour Schemes For A Bigger Feel
Pick paints and tiles with a high LRV (60+). Soft whites, light greys, and warm neutrals bounce light and calm the room. Keep grout lines thin and run the same floor tile into the shower for an unbroken look. Clear glass screens beat frosted in small rooms.
Extra Space Savers
Use a sliding door, narrow towel rails, and a wall-hung toilet. Choose a single glass panel for the shower to cut visual clutter. Could a sun tunnel or skylight bring in more daylight?
Storage Solutions
Built-In Shelving
Recess shelves between studs for a tidy, custom fit. Seal with moisture-resistant linings and finish with tile or compact laminate. Add a power point inside a tall cabinet for toothbrushes or shavers and keep benchtops clear.
Recessed Shower Niches
A 300 × 600 mm niche keeps bottles off the floor and out of the spray line. Slope the base slightly toward the shower to drain water. Waterproof the niche carefully and set the height near shoulder level for easy reach.
Over-The-Toilet Cabinetry
Use 200–250 mm depth so it doesn’t crowd the room. Leave clearance above the cistern lid for access. Fix into studs, include a mix of open shelves and doors, and store paper goods high and dry.
Smart Organisers
Drawer dividers, pull-out bins, and hooks keep daily items easy to grab. Where will towels live when four people shower back-to-back?
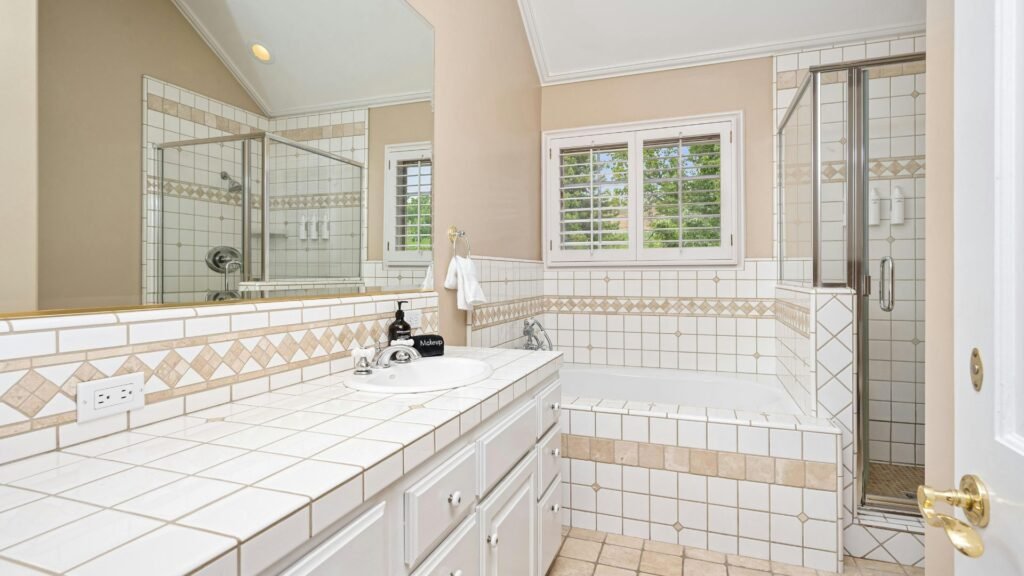
Shower And Bath Upgrades
Rainfall Showerheads
Choose a 200–300 mm head for full coverage and pair it with a hand shower on a rail for flexibility. Look for water-saving flow rates and a smooth mixer. If pressure varies, a thermostatic valve helps hold a steady temperature.
Walk-In Vs Enclosed Shower Styles
Walk-in designs suit small rooms and step-free entries. A single fixed panel at 1,100–1,200 mm often contains spray while keeping the room open. Enclosed showers hold warmth in cooler regions and reduce drafts. Plan fall to a linear drain and create a low-profile threshold for safer access.
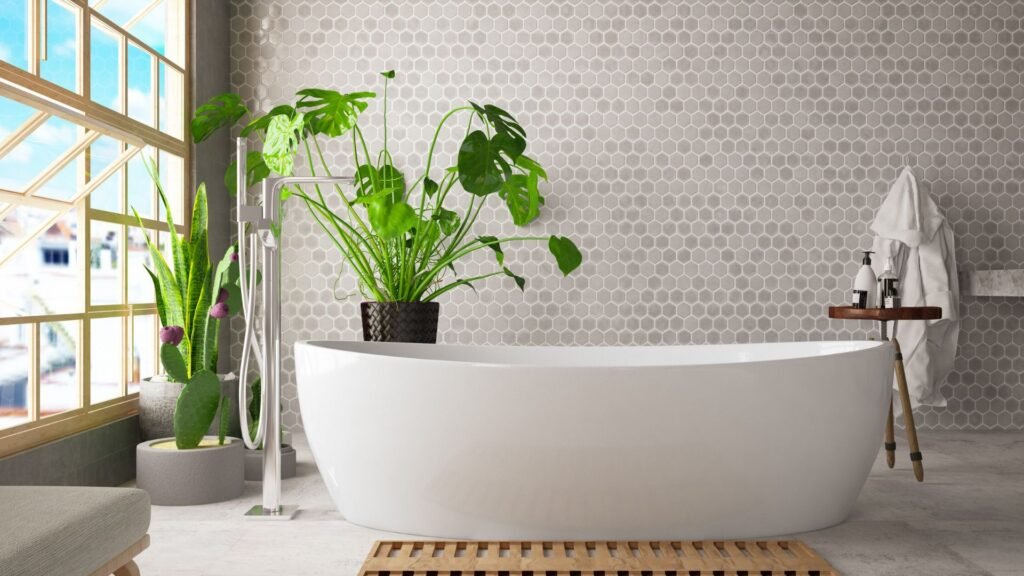
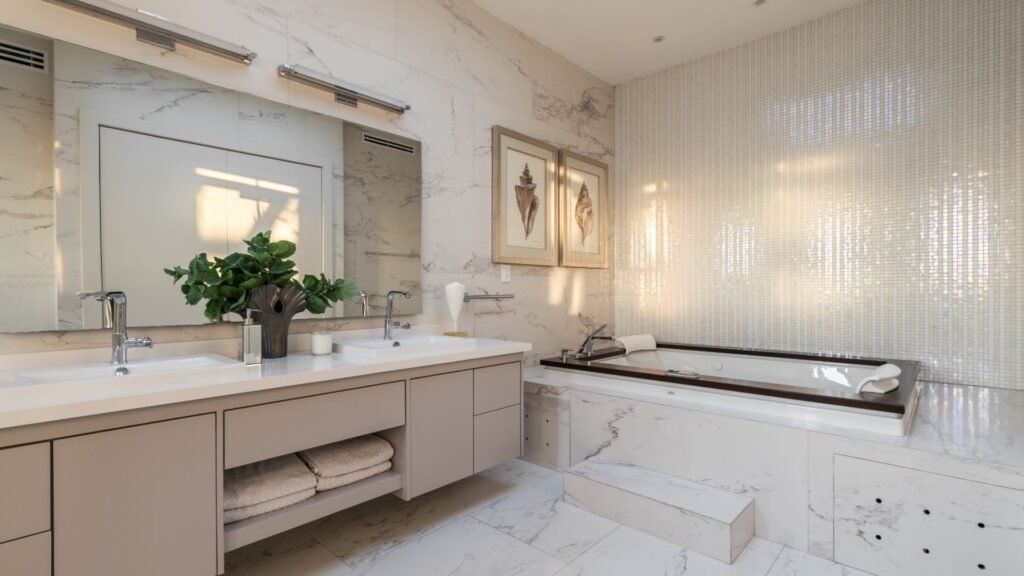
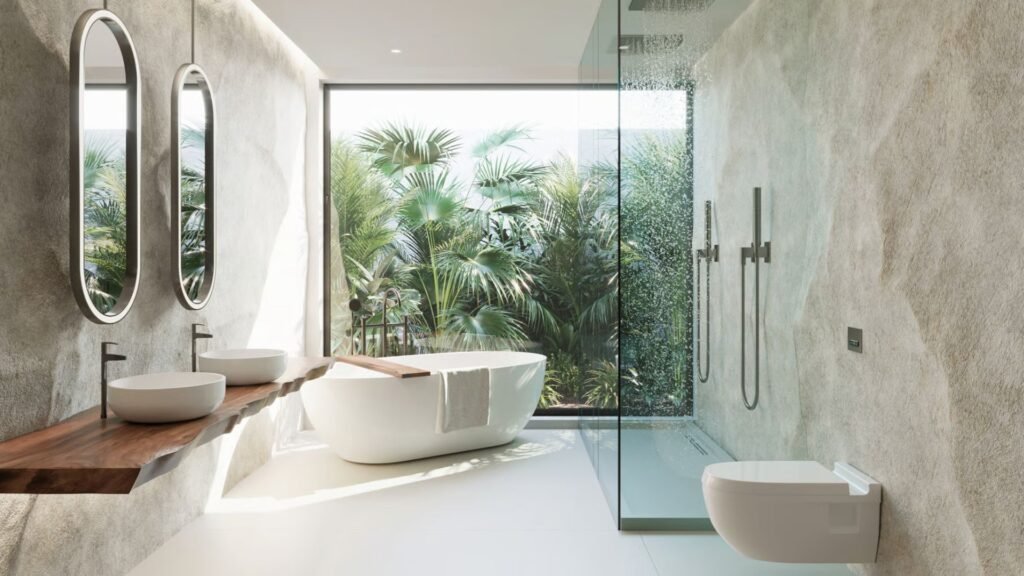
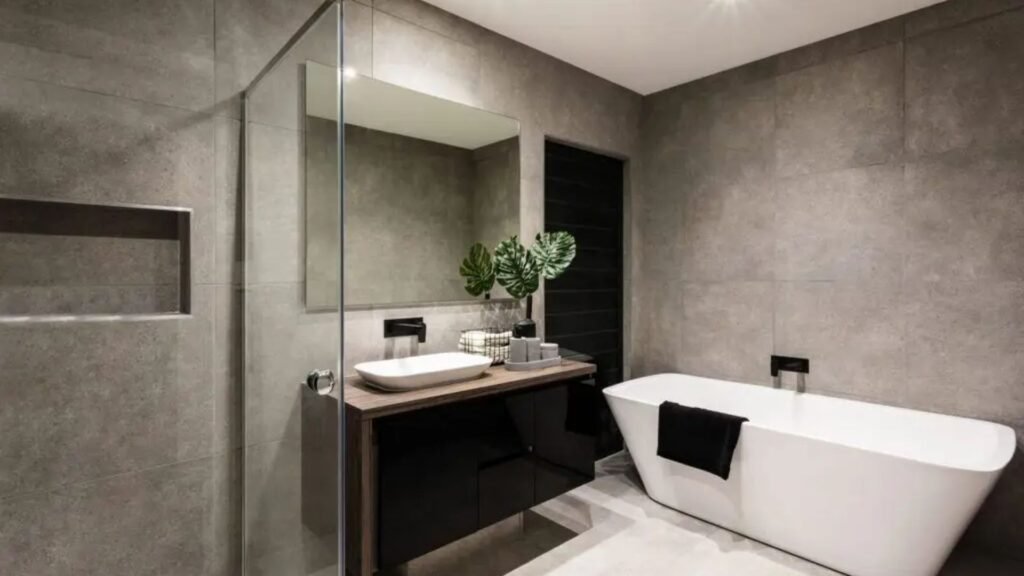
Freestanding Tubs For Larger Homes
Freestanding baths make a strong focal point, but they need space. Allow at least 250–300 mm clearance on visible sides for cleaning. Heavy stone models may need floor checks. In tighter rooms, a back-to-wall freestanding or an inset bath with a tiled apron saves space.
Layout Tips
Keep major plumbing on one wall to cut costs. Do doors swing into walkways? Would swapping the vanity and toilet improve flow?
Flooring And Wall Options
Tiles: Porcelain, Ceramic, Textured Finishes
Porcelain is dense and hard-wearing; ceramic is a solid, cost-friendly choice for walls. Pick slip-resistant textures for floors and smooth tiles for walls to make cleaning easy. Large formats reduce grout lines. Use quality waterproofing and consider epoxy grout in wet zones.
Vinyl As A Budget-Friendly Alternative
Modern sheet or hybrid vinyl handles splashes, feels warmer underfoot, and installs fast. Choose bathroom-rated products and seal edges around wet areas. Vinyl works well when you want a quick refresh without the cost of full tiling.
Heated Flooring For Cold NZ Winters
Electric under-tile mats deliver steady warmth and dry floors faster. Add a programmable thermostat and insulation boards to lift performance. Place heating where feet land most, vanity, shower entry, and in front of the bath.
Wall Finishes
Mix tiled wet zones with paintable, moisture-resistant linings elsewhere. A full-height tiled feature behind the vanity adds punch without tiling the entire room.
Eco-Friendly Choices
Low-Flow Showerheads And Taps
Water-saving showerheads and aerated mixers cut use without losing comfort. Pair with a thermostatic mixer to reduce “let it run” time. A dual-flush toilet drops water bills further.
Energy-Efficient Lighting
LED downlights with bathroom-safe ratings deliver bright, low-cost light. Aim for 3,000–4,000 K for a clean, natural tone and a high CRI for true skin tones. Layer task lighting at the mirror with soft ambient light overhead.
Recycled Or Sustainable Materials
Choose FSC-certified timber, recycled tiles, and tapware from brands that use recycled brass. Pick low-VOC paints and sealants to keep indoor air fresher. Can you repurpose a timber vanity top or reuse a mirror frame?
Smart Ventilation
A quiet, strong extractor fan clears steam and protects finishes. Wire it to a timer or humidity sensor so it runs long enough after showers.
Daily Habits That Help
Shorter showers, cooler wash temps, and cross-ventilation add up. Small choices each day support the work you put into the room.
Budget-Friendly Bathroom Renovation Ideas
Make smart updates that lift style and function without a full rebuild. Focus on high-impact changes you can plan and finish fast.
Refresh With Paint Instead Of Full Tile Replacement
- Clean first. Treat mould, degrease surfaces, and let everything dry. Good prep helps paint last in NZ’s damp climate.
- Choose moisture-resistant paint for walls and ceilings. Look for “bathroom” or “wet-area” on the label.
- Keep colours light to open up small rooms. Soft whites, warm greys, and pale taupe make spaces feel larger.
- Don’t love your tiles? Use a tile-appropriate primer and a two-part epoxy or enamel topcoat. Paint grout with a grout pen to revive lines.
- Seal edges and joins with fresh silicone. It looks cleaner and helps prevent leaks.
- Ask yourself: do you need a full retile, or will a crisp paint job plus new silicone do the job right now?
Replace Hardware (Taps, Handles) For A Quick Update
- Match finishes across the room. Pick one finish, black, brushed nickel, chrome, and stick to it for taps, shower head, towel rails, and cabinet pulls.
- Swap old taps for water-saving mixers with a strong flow. Check the WELS rating used in NZ to cut water use without losing pressure.
- Measure before you buy. Cabinet handle “centre-to-centre” spacing must match, or choose larger pulls that cover old holes.
- Upgrade the shower head. A modern rain or multi-function head lifts the feel right away.
- Replace tired accessories. New toilet roll holders, robe hooks, and a slimline soap dispenser tidy the look.
- Keep tools handy: adjustable wrench, plumber’s tape, hex keys. Turn off water at the isolation valves before you start.
Add Lighting Upgrades
- Layer your lighting. Ambient, a ceiling light for overall brightness. Task, mirror or vanity lights at face level to reduce shadows. Accent, a small wall light or LED strip in a niche for mood.
- Choose LED for lower power use and long life. Aim for warm to neutral white (around 3000–4000K) for skin-friendly tones.
- Check IP ratings in wet zones. IP44 or higher near showers is a safe bet. For hard-wired changes, use a licensed NZ electrician.
- Add a dimmer to shift from bright morning prep to a calm evening soak.
- Consider a backlit mirror. It improves visibility and removes harsh shadows.
- Ask yourself: can better lighting solve what you dislike about the space more than new tiles would?
Use Plants And Décor For A Fresh Look
- Pick humidity-friendly plants. Peace lily, pothos, Boston fern, and snake plant handle steam well. Place them where they still get light.
- Add texture with natural elements. Think timber trays, woven baskets, and ceramic canisters to hold daily items.
- Curate your colours. Choose two to three tones for towels and mats, then repeat them for a tidy, calm look.
- Hang simple, moisture-safe art or a framed print sealed behind glass. Keep it off direct spray.
- Clear clutter. Use a small tray for everyday items. Put spares in covered storage so benchtops stay clean.
- Refresh scent with a reed diffuser or essential oil spray. A light, clean scent lifts the room without overpowering it.
Quick Checklist To Get It Done This Weekend
- Friday: buy paint, silicone, handles, taps, and LED bulbs.
- Saturday morning: prep, mask, and paint walls and ceiling.
- Saturday afternoon: replace tapware and handles, lay new silicone.
- Sunday: install lighting upgrades and a backlit mirror with a licensed electrician, style with plants and fresh towels, take photos.
Helpful Extras For Search And Readability
- Add before-and-after photos with descriptive alt text like “small bathroom makeover with painted tiles and new black tapware.”
- Use clear subheadings and short sentences so readers can scan on mobile.
- Link to related guides such as small bathroom storage ideas or a NZ bathroom cost breakdown.
These focused steps deliver a clean update for Kiwi homes, keep spend in check, and give you a bathroom that looks fresh, feels bigger, and works better every day.
Mistakes To Avoid In A Bathroom Renovation
Ignoring Ventilation In Nz’s Damp Climate
Moist air builds up fast in Kiwi bathrooms. Condensation leads to mould, swollen cabinetry, and peeling paint. You need steady airflow that removes steam at the source.
- Install a ducted extractor fan that vents outside, not into the roof space.
- Choose a quiet model so you actually use it daily.
- Add a timer or humidity sensor so the fan runs after showers.
- Keep a small gap under the door to let fresh air in while the fan pulls air out.
- Openable windows help, but fans do the heavy lifting in winter.
- Dry towels with a heated rail to cut lingering moisture.
- Quick check: after a hot shower, your mirror should clear within minutes. If not, your extraction is undersized or poorly ducted.
Poor Lighting Placement
Good lighting makes a small room feel bigger and safer. Bad placement creates shadows and glare that age a space fast.
- Layer your lights: bright task at the mirror, soft ambient in the room, optional accent for mood.
- Mount vanity lights at eye level on both sides of the mirror, or use an even back-lit mirror to avoid harsh shadows.
- Pick warm to neutral colour temperature between 2700K and 3500K for a calm, natural look.
- Aim for high colour accuracy (CRI 90+) so skin tones look right.
- Use dimmers to shift from morning bright to evening calm.
- Choose fittings with the right moisture rating near showers and tubs.
- Test it: stand at the mirror and check for chin or forehead shadows. If you see stripes, adjust placement or switch to diffused fixtures.
Overlooking Waterproofing
Water finds every gap. One pinhole in a membrane can cost thousands later.
- Use a proven waterproofing system in showers, around baths, and on wet floors.
- Ensure proper falls to the drain before tiling so water does not pool.
- Seal corners, niches, and penetrations with tapes and compatible sealants.
- Use tile backer boards or moisture-resistant substrates in wet zones.
- Get a licensed waterproofer and keep the warranty paperwork and photos.
- Let membranes cure fully before tiling to avoid failures.
- Red flags: soft or spongy floors, cracked grout, or a musty smell. Fix the source, not just the surface.
Choosing Style Over Function
Looks matter, but daily use matters more. Plan for real life in a New Zealand home.
- Start with layout: clear walk paths, easy door swings, and room to dry off.
- Pick a vanity with storage that fits your routines, not just the catalogue photo.
- Choose slip-resistant flooring, especially in family or rental homes.
- Keep cleaning in mind: frameless glass, larger tiles, and wall-hung fixtures reduce grime traps.
- Future-proof with blocking in walls for grab rails or heavy accessories.
- Match fixtures to water pressure so showers feel great, not weak.
- Balance trends like matte black with items that are easy to maintain or replace.
- Reality test: picture a busy winter morning. Can two people use the space without bumping elbows or fogging up everything?
Quick Pre-Renovation Checklist
- Ventilation sized and ducted to the exterior.
- Layered lighting plan with dimmers and safe ratings.
- Documented waterproofing system and fall to wastes.
- Layout, storage, and finishes designed for daily use and easy cleaning.
- Write for people first. Make choices that keep moisture out, light where you need it, and water where it belongs. That is how your bathroom looks great on day one and still works years from now.
Cost Guide: Bathroom Renovation In NZ
Bathroom renovation costs in New Zealand vary by scope, finishes, and where you live. For today’s market, plan a realistic range, then fine-tune once you lock the layout and fixtures. Labour is a large slice of the bill, so smart planning saves real money.
Average Costs By Renovation Level
Small / Budget Refresh (Paint, Tapware, Vanity Swap, Vinyl Or Limited Tiling)
- $8,000–$15,000. Keep the layout, choose mid-range fixtures, and you can stay near the lower end.
Mid-Range Renovation (New Shower, Quality Tiles, Custom Vanity, Better Lighting)
- $15,000–$30,000 for most NZ homes. This tier balances durability with style.
High-End / Luxury (Tiled Walk-In Shower, Underfloor Heating, Designer Fixtures, Stone Tops)
- $35,000–$70,000+ depending on size, waterproofing detail, and brands. Some projects go higher.
Key Factors That Affect Costs
Size And Complexity
More floor and wall area means more tiles, prep, and labour. Bigger showers and custom storage also lift costs.
Layout Changes
Moving a toilet, shower, or bath adds plumbing and consent steps. Keeping the layout cuts spend. Note: tiled wet-area showers generally need building consent in NZ.
Materials And Fixtures
Porcelain tiles, solid-surface tops, frameless glass, and branded tapware cost more than vinyl, laminate, framed screens, and entry lines. Choose where quality matters most.
Labour Rates And Region
Expect qualified trades to charge about NZD $75–$120 per hour; cities usually cost more than rural areas. Labour often represents 40–50% of the total.
Waterproofing And Compliance
Wet areas must meet NZ Building Code moisture standards. Use proven membranes and trained installers to avoid leaks and rework.
Age And Condition Of The Room
Old plumbing, uneven floors, or hidden water damage add time and materials once walls are open. Build a contingency.
Where To Save And Where To Invest
Save Here
- Keep The Existing Layout: Avoid moving waste pipes and supply lines; the savings are immediate.
- Retain Or Refinish What’s Sound: Refinish a good vanity, reuse quality mirrors, and swap handles for a clean update.
- Mix Materials Smartly: Use feature tiles only where they show. Pair large-format porcelain on walls with vinyl plank on floors for value.
- Shop Fixture Tiers: Select mid-range tapware with solid warranties; skip designer lines where they don’t add daily value.
Invest Here
- Waterproofing And Substrate Prep: Pay for certified membranes and correct fall to drain. Failures are costly and hard to fix later.
- Plumbing And Electrical: Use licensed pros and quality fittings. It protects your home and resale. Hourly rates vary; plan adequate labour budget.
- Ventilation: Fit a proper extraction fan to control moisture and extend finish life.
- Glass And Shower System: Go sturdy on sliders, hinges, and channels; cheap hardware fails early.
- Heating Where It Counts: Underfloor heating or heated towel rails improve comfort in colder regions and help drying.
Quick Budgeting Tips
- Get 2–3 itemised quotes with the same scope and brands.
- Hold a 10–15% contingency for behind-wall surprises.
- Order long-lead items early to avoid delays.
- Confirm consent needs up front, especially for wet-area showers and significant plumbing changes. Check your council’s guidance if unsure.
By sizing your project against these ranges, locking the layout, and investing in waterproofing and core services, you’ll control costs while building a bathroom that lasts.
Hiring Professionals Vs DIY
You want a great result without stress. The fastest way there is to match the task to the right level of skill, risk, and compliance. Use DIY for low-risk surface upgrades. Bring in licensed pros for anything that touches water, power, structure, or waterproofing. Ask yourself: could this fail and cause damage? Would consent, licensing, or warranties be affected? If yes, hire.
When It Makes Sense To DIY
- Paint walls and ceilings after proper prep.
- Install mirrors, shelves, towel rails, and hooks.
- Replace soft finishes: shower curtains, blinds, towels, mats.
- Style with plants, art, and storage baskets.
- Re-silicone and re-grout minor areas if you have the patience and follow product specs.
- Limited electrical maintenance is legal for homeowners (for example, replacing a light switch or socket) only if you follow WorkSafe’s rules to the letter. If you’re unsure, stop and call an electrician.
Quick DIY Checks
- No new plumbing, wiring, or membranes.
- No work that compromises ventilation or moisture control.
- Keep receipts and product details for future maintenance.
When To Hire Experts
- Plumbing changes, fixture installs, leaks, or any work on supply or waste lines. In New Zealand this is regulated work and must be done by a licensed plumber or drainlayer.
- Electrical work beyond the narrow homeowner list. Use a licensed electrician for new lights, fans, heated floors, mirror demisters, or any wiring changes.
- Waterproofing showers, wet rooms, and floors. Work must meet Building Code clause E3 (Internal Moisture) and accepted solutions; failures are costly. Hire a specialist waterproofing contractor and an LBP builder where required.
- Structural changes, new windows, or layout shifts that affect walls, doors, or glazing safety. An LBP can confirm consent needs and compliance.
Pro-Only Red Flags
- You’re moving a shower, toilet, or vanity.
- You’re adding underfloor heating or a new extractor fan.
- You can’t confirm how to meet code or manufacturer specs.
- You want product and workmanship warranties to stand.
Finding Trusted NZ Contractors
Use a shortlist process. Aim for three quotes with the same scope so you can compare like-for-like.
Where To Look
- LBP Register to verify licensed builders and view license history.
- PGDB Public Register for licensed plumbers, gasfitters, and drainlayers.
- Master Electricians “Find an Electrician” for vetted members who issue electrical safety certificates.
- Master Plumbers “Find a Master Plumber” for member businesses that meet industry standards.
How To Vet
- Ask for licence IDs and recent bathroom references.
- Request a written scope, timeline, and payment schedule tied to milestones.
- Confirm who handles consent, producer statements, and sign-offs.
- Check proof of insurance and warranties on waterproofing membranes and fixtures.
- Read independent reviews and look at photo evidence of similar work.
Smart Handover
- Keep compliance docs: waterproofing warranties, electrical safety certificates, invoices, manuals, and care guides.
- Photograph critical stages (before tiling and after membrane application) for your records.
- Log paint codes, grout colours, and tile batches for future repairs.
- Bottom line: keep DIY to cosmetic upgrades. For plumbing, electrical, and waterproofing, hire licensed NZ pros so your bathroom looks great, meets the code, and holds its value under “bathroom renovation ideas NZ.”
Final Touches And Styling Tips
When your main bathroom renovation work is complete, it’s the small details that truly bring the space together. Final touches not only enhance the look of your bathroom but also create a warm and inviting atmosphere that feels personal to you. These styling tips are simple, affordable, and make a noticeable difference in any New Zealand bathroom.
Add Mirrors, Plants, And Artwork
Mirrors are more than just functional pieces, they reflect light and can instantly make your bathroom look larger and brighter. For smaller NZ bathrooms, a large round or rectangular mirror above the vanity can open up the space. Adding greenery is another easy way to breathe life into the room. Choose low-maintenance plants such as ferns, orchids, or peace lilies that thrive in humid conditions. To complete the look, consider hanging small framed artwork or prints that suit your style. This helps turn a plain bathroom into a space with personality.
Choose Soft Furnishings: Towels, Rugs, And Accessories
The right soft furnishings make your bathroom feel cozy and lived-in. Fresh, fluffy towels in neutral tones give a spa-like vibe, while colourful options add personality. A stylish bath mat or small rug provides comfort and prevents slips, especially on tiled floors. Accessories such as soap dispensers, toothbrush holders, and storage baskets also contribute to a clean, coordinated look. In New Zealand homes where bathrooms are often compact, these small details help keep things tidy and practical without sacrificing style.
Scent And Ambiance With Candles Or Diffusers
Your bathroom should be a place where you can relax, not just a functional space. Adding scent can transform the atmosphere instantly. Scented candles create both aroma and soft lighting, perfect for winding down after a long day. Alternatively, reed diffusers or essential oil diffusers provide a constant fresh fragrance without needing a flame. Popular choices in NZ bathrooms include lavender, eucalyptus, or citrus scents, which feel clean and refreshing.
By paying attention to these finishing touches, you can elevate your bathroom renovation beyond just fixtures and fittings. Mirrors, plants, textiles, and scents help create a space that feels complete, where functionality meets comfort and style.
Need more renovation tips? Explore our homepage and learn how to create a bathroom that balances function, comfort, and style.
FAQs: About Bathroom Renovation Ideas In NZ
What are the most popular bathroom renovation ideas in New Zealand?
Popular ideas include walk-in showers, floating vanities, large mirrors, heated flooring, and natural finishes like stone and wood. Many NZ homeowners also choose black accents and minimalist designs for a modern look.
How much does a bathroom renovation cost in NZ?
The cost varies depending on size and materials. A small bathroom refresh can start around $5,000–$10,000, while mid-range renovations average $15,000–$25,000. Luxury upgrades with high-end fittings can exceed $30,000.
What bathroom upgrades add the most value to a home in NZ?
Upgrades that add the most value include new showers or bathtubs, modern vanities with ample storage, energy-efficient fixtures, and stylish tiling. Buyers in NZ often look for modern, functional bathrooms when considering a property.
How can I renovate my bathroom on a budget?
Budget-friendly ideas include repainting walls, replacing tapware and handles, upgrading lighting, adding mirrors, and using vinyl flooring instead of tiles. Small changes can refresh your bathroom without major expenses.
What are some eco-friendly bathroom renovation ideas for NZ homes?
Eco-friendly options include installing low-flow showerheads, dual-flush toilets, LED lighting, and using sustainable materials like recycled tiles or bamboo cabinetry. These upgrades help reduce energy and water usage.
Should I DIY my bathroom renovation or hire professionals in NZ?
DIY is fine for cosmetic changes like painting, replacing fittings, or adding décor. For plumbing, waterproofing, tiling, and electrical work, it’s best to hire licensed NZ professionals to ensure safety and compliance.
How do I make a small bathroom feel bigger?
Use light colours, large mirrors, floating vanities, and glass shower screens. Good lighting and vertical storage solutions can also make small NZ bathrooms appear more spacious.
What bathroom styles are trending in New Zealand?
Trending styles include minimalist bathrooms with clean lines, natural tones, black matte finishes, walk-in showers, and modern farmhouse touches. Neutral palettes paired with greenery are also popular in NZ homes.
What mistakes should I avoid when renovating a bathroom in NZ?
Common mistakes include poor ventilation, inadequate waterproofing, choosing style over functionality, and underestimating costs. In NZ’s damp climate, ensuring proper airflow and moisture control is essential.
How long does a bathroom renovation take in New Zealand?
A basic refresh can take 1–2 weeks, while a full renovation with new plumbing and tiling may take 4–6 weeks. Timelines depend on the scope of work, availability of tradespeople, and material supply.
Conclusion
Bathroom renovation ideas in NZ offer endless possibilities, from simple updates like fresh paint, mirrors, and modern tapware to larger projects such as walk-in showers, freestanding tubs, and heated flooring that bring both comfort and value to your home. The key is to plan carefully, balancing functionality with style, so that your new bathroom not only looks great but also works for your everyday needs. Whether you choose to start small with DIY upgrades or invest in a full remodel, every step you take brings you closer to creating a space that feels modern, practical, and uniquely yours. Explore design inspiration, talk to trusted professionals when needed, and focus on smart choices that match your budget and lifestyle, ensuring your bathroom renovation is a rewarding investment for years to come.